
Guildrun is a single-player PvE roguelike autobattler. You choose heroes, items, relics, specializations, and board positions; combat then resolves automatically. The important skill is not fast clicking. It is reading what happened and spending the next reward on a specific weakness.
Choose, place, fight, diagnose, improve
A run begins with one of three hero-and-relic bundles and 15 spendable Shards. Your opening only needs to survive the first fights; it does not have to lock the final build. After combat, rewards and shops let you recruit, buy equipment, rank heroes, and refine the formation before the next node.
- Inspect the encounter.Check enemy range, abilities, formation, and any fight modifier before moving a hero.
- Choose the active board.Field three heroes at first, then expand toward five; reserve heroes can still matter through Backup effects.
- Predict first contact.Name the hero who should take the first attacks and the enemy your main damage dealer should reach.
- Watch the first failure.Record the first important death, interrupted cast, wasted walk, or target that survived too long.
- Spend for that failure.Buy durability, damage, mana, range, a duplicate, or a new role only when it changes the next fight.
| Run phase | Your decision | Player check |
|---|---|---|
| Opening draft | Choose one of three hero-and-relic bundles. | Prefer a clear first job and a usable relic trigger over a bundle that only looks rare. |
| Regular fights | Place the active formation, then let combat resolve. | Watch first contact, the first important cast, and the first hero to fall. |
| Rewards and shops | Recruit, rank, equip, reroll, sell, or freeze offers. | Spend against one observed failure and preserve Shards once that failure is fixed. |
| Campfires and events | Take route-dependent upgrades, trades, fights, or recovery. | Compare the permanent run value with the health and flexibility needed for the next floor. |
| Boss and Auction House | Clear the act boss, then choose from a larger premium shop. | Treat board size, a key rank, and an engine relic as competing power spikes. |
| Endless or next run | Continue with a scaling engine or bank what the run unlocked. | Separate repeatable growth from flat bonuses that are already being outscaled. |
Before leaving a shop, you should be able to explain what the purchase fixes. “More power” is not enough; “Fiona now casts before Pimenta drops below half health” is a useful answer.
Build a functioning team before a perfect synergy
Start with three jobs: an anchor that accepts opening pressure, a reliable damage dealer, and a support or control piece that buys time. These are jobs, not mandatory class labels. A shielded Warrior can anchor, while Frost or Stun can provide survival without a traditional healer.
| Job | Question it answers | Good early evidence | Examples |
|---|---|---|---|
| Anchor | Who receives the first attacks? | Survives until the first allied ability resolves. | Pimenta, Skorn |
| Primary damage | How does the formation finish priority targets? | Reaches a useful target and keeps attacking or casting. | Dragomir, Hoyoung |
| Support / control | What gives the team enough time to work? | Shields, healing, Frost, or mana arrives before collapse. | Fiona, Grace |
| Secondary plan | What happens if the carry is blocked? | A second hero still damages the right lane or scales late. | Area damage, status damage, or a different target rule |
When to add another hero
Add a recruit when it fills a missing job, protects a proven carry, reaches a problem enemy, or provides a useful Backup effect. Delay expansion when the current core still needs a duplicate, rank, or key item. Five underdeveloped heroes can be weaker than three pieces with clear jobs.
Read the threat before changing the build
Enemy families change by tier, encounter, and Endless scaling. Start with three facts: attack range, special ability, and which allied hero is closest. Then check the exact variant stats. A Mushroom Archer pressures differently from a Turtle even when both appear on the same floor.
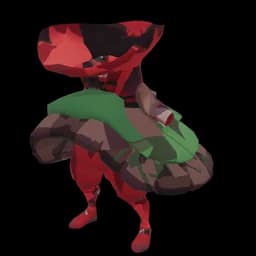 Melee · 9 variants
Turtle
Campaign / Event fights
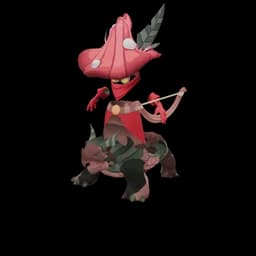 Ranged · 115 variants
Mushroom Archer
Campaign / Endless / Event fights
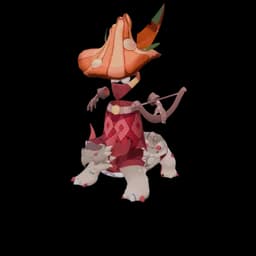 Ranged · 73 variants
Mushroom Fire Mage
Campaign / Endless
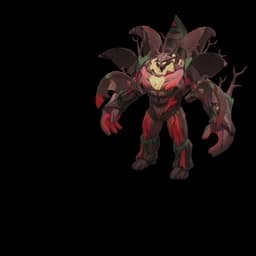 Melee · 57 variants
Forest Golem
Campaign / Event fights
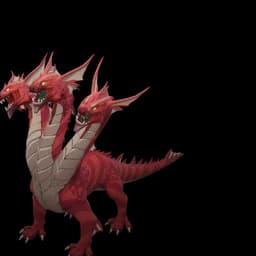 Melee · 3 variants
Hydra
Event fights
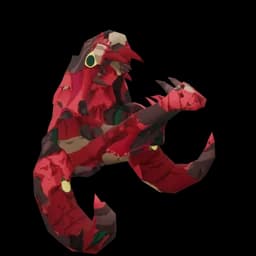 Melee · 3 variants
Demon
Event fights
A reliable pre-fight scan
- Find the longest range.It often decides which enemy deals uninterrupted damage first.
- Find the disruptive ability.Stun, status application, summons, and area damage may matter more than base Attack.
- Open the exact variant.Tier and event versions can have different health, offense, and special rules.
- Choose one priority.Move or target around the enemy that breaks your current formation, not simply the highest-health body.
Distance decides most opening targets
Most units choose the closest valid target. If two targets are the same distance away, the game uses class priority, then targeting health, then an internal tie-break. Put the intended anchor strictly closer whenever possible; do not rely on a class name to pull attacks through bad geometry.
| Order | Targeting check | What to do with it |
|---|---|---|
| 1 | Closest valid hero | Make the intended anchor strictly closer whenever possible. |
| 2 | Class priority on a distance tie | Tank → Vanguard → Warrior → Duelist → Assassin → Mage → Mystic. |
| 3 | Lower log2(current HP) + Defense / 100 | Lower log2(current HP) + Defense / 100 wins the tie. |
| 4 | Hidden identity | Avoid exact ties when the opening target must be predictable. |
Place in this order
- Anchor first.Choose the hex that collects the intended opening attacks.
- Carry second.Confirm range and walking path to the priority target.
- Support third.Keep the support close enough to affect allies without becoming the next target.
- Predict the handoff.Know who becomes closest if the anchor dies, moves, Taunts, or gains Stealth.
If the intended carry spends several seconds walking, the problem is often access, not damage. A one-hex adjustment can outperform an expensive offensive purchase.
What can change the expected target
- A unit ranks targets before checking its route. If the best target cannot be reached, pathfinding can force a fallback.
- Once an attack begins, the victim is locked. A launched projectile can still connect after the target gains Stealth.
- A pull or teleport does not automatically cause every enemy with a valid target to choose again.
- Taunt, Stealth, range, and special ability text can override the normal expectation; read the exact mechanic before moving the board.
Read combat results in the right order
| Rule | Current behavior | How to use it |
|---|---|---|
| Damage order | Immunity → Crit → Defense → Shields → HP | If damage looks unexpectedly low, check the earliest layer that changed instead of buying raw Attack immediately. |
| Mana gain | +5 Mana per auto attack; passive regeneration ticks every 2 seconds | Range and Attack Speed can change cast timing because both affect how soon attacks begin and repeat. |
| Ability casting | A hero casts automatically at the required Mana threshold | Protect the cast window and watch for movement, control, or mana-lock rules that delay it. |
| Front and back rows | Front row is y=3; back row is y=0 | Row-sensitive effects care about board coordinates, not whether a hero merely appears visually near the front. |
| Adjacency | Adjacent means a hex distance of 1 | Check every linked hero after moving one unit; a single hex can break several adjacency effects. |
| Storm | Begins at 50 seconds and escalates; Riftbreaker appears at 90 seconds | A formation that only survives without finishing eventually loses to the anti-stall clock. |
Recruit for a job, then grow into a build
Each hero has 15 base statistics, a Rank C ability, rank gains, and three specialization routes. Read the starting ability first, then ask whether the hero's range and targeting can deliver it. Specializations should deepen a working plan or repair a known weakness rather than force a theme too early.
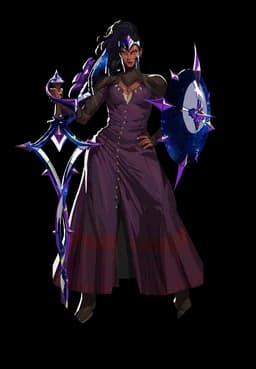 Tank · Melee
Pimenta
Front-line Poison Tank and formation anchor
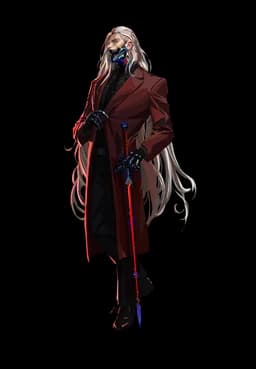 Assassin · Melee
Dragomir
Melee executioner with economy scaling
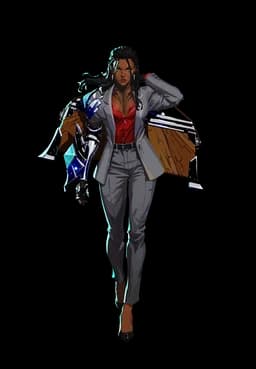 Mystic · Ranged
Fiona
Shield support with economy and scaling branches
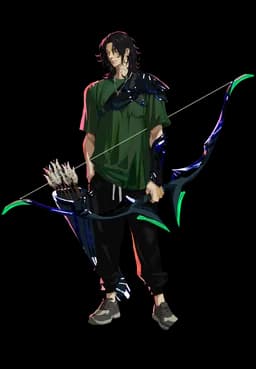 Assassin · Ranged
Hoyoung
Long-range back-line executioner
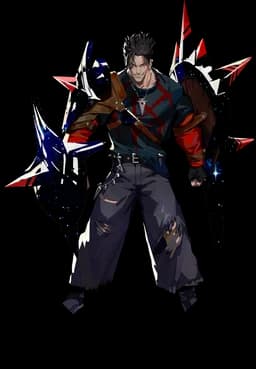 Tank · Melee
Skorn
Retaliation Tank and status front line
 Mystic · Ranged
Grace
Late-fight shield, healing, and resurrection support
Use the detail pages while a shop is open
Compare the exact base stats, rank growth, ability text, and all three specializations before buying. The next guide explains how team size, items, relics, ranks, difficulty, and route rewards fit into a complete progression plan.
Spend Shards only after naming the result you need
A regular shop is a short decision window, not an invitation to empty the wallet. Read all six offers, decide whether the board needs a recruit, rank, item, or relic, then set a stop condition before the first reroll. The Auction House is a separate premium breakpoint after a boss, so Shards saved for it must still survive the fights required to reach it.
| Regular shop rule | Value | Player decision |
|---|---|---|
| Starting Shards | 15 | Enough to make an opening decision without forcing a full build. |
| Offers | 3 heroes · 2 items · 1 relic | Read the whole shop before buying the first attractive piece. |
| Sale | One random offer at 25% off | A discount improves value; it does not create a missing trigger. |
| Reroll | Starts at 1 Shard, then rises by 1 | Name the exact result you are rolling for. |
| Freeze | Carries offers to the next regular shop | Freeze a real breakpoint, not a vague future possibility. |
| Sell | Heroes and items return 66% | Selling can fund a pivot, but repeated reversals drain the run. |
| Relic sale | Relics cannot be sold | Narrow relics carry a larger opportunity cost. |
Auction House checkpoint
| Rule | Current value |
|---|---|
| Offers | 3 heroes · 4 items · 3 relics |
| Guaranteed slots | Legendary offer · legendary quest relic · epic item · Harmony Crystal |
| Reroll | Starts at 7 Shards |
| Freeze | Unavailable |
| Board-size choice | Team Size competes with immediate ranks, equipment, and relic engines |
Shop interface systems
Freeze
Keep a regular Shop's offers until the next visit.
Auction House
After a Boss, browse more and higher-rarity offers. It cannot be frozen.
Rift Key
Assemble the Rift Key from Shop fragments; the fragment cost increases at each Shop.
Scaling Indicator
Shows which abilities scale with the stats on an item before you commit the purchase.
Price reference
| Offer type | Shard cost |
|---|---|
| Hero | C 15 · B 25 · A 35 · S 45 |
| Item | Common 5 · Rare 15 · Epic 25 |
| Relic | Common 10 · Rare 20 · Epic 30 · Legendary 40 |
| Team Size | 45 |
Recover from a loss without repeating it
- Emergency RewindStarts at 10 and increases by 5 after each win. It can absorb a normal-fight loss and let you retry. Use the retry to test a precise positioning or purchase change, not to repeat the same board unchanged.
- Shard MaximizerInterest follows min(Shards // 5, 20). Saving is useful only while the board remains stable; missing a clear power spike to protect interest can cost the run.
- Permanent versus battle-only growthSome gains last for the run while others reset after combat. The effect text decides which layer is being changed. Deep-run plans need repeatable or run-long growth, while a temporary effect can still be correct for the next boss.